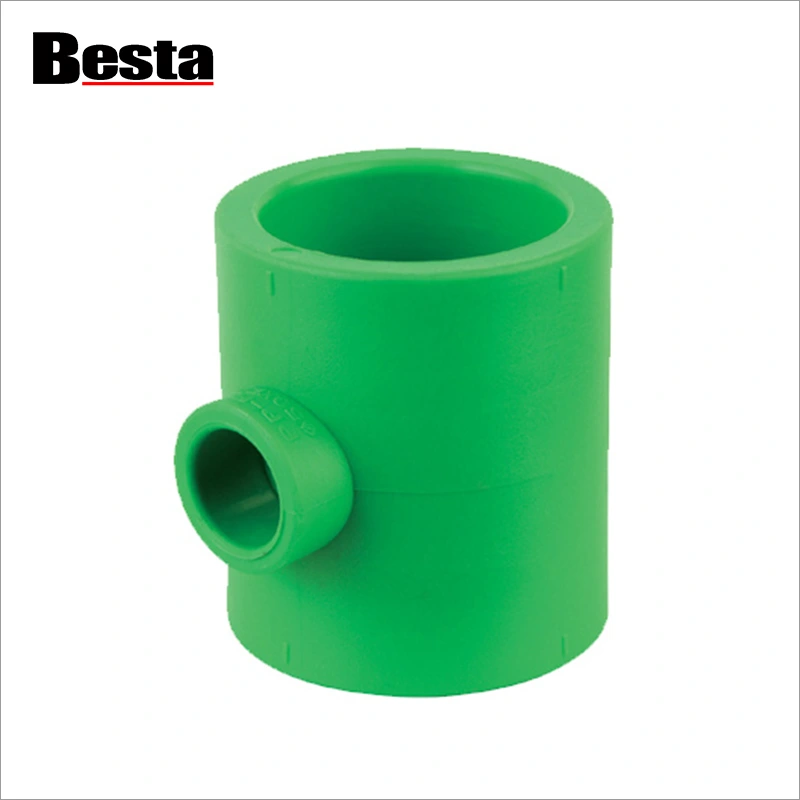
What Are the Recommended Installation Methods of a PPR Reducing Tee in a Plumbing System?
2024-12-18
PPR (Polypropylene Random Copolymer) fittings, including reducing tees, are widely used in plumbing systems due to their durability, corrosion resistance, and cost-effectiveness. To ensure the long-term reliability of a PPR reducing tee, proper installation and adherence to best practices are essential. Here’s a comprehensive guide to achieving optimal performance and durability.
1. Choose the Right PPR Reducing Tee for the Application
- Match Pipe Sizes: Ensure the reducing tee’s branch and main diameters are compatible with the pipes in your system.
- Check Pressure Ratings: Confirm the fitting’s pressure rating matches the operating conditions of the plumbing system.
- Verify Material Quality: Use fittings manufactured by reputable brands that comply with industry standards like ISO 15874.
2. Prepare the Pipes and Fitting
- Clean the Surfaces: Remove any dirt, grease, or debris from the pipe ends and the interior of the reducing tee to ensure a secure joint.
- Cut Pipes Accurately: Use a pipe cutter to make clean, perpendicular cuts. Avoid jagged edges that could compromise the weld.
- Chamfer and Deburr: Smooth out the cut edges to facilitate proper insertion into the fitting.
3. Follow Proper Fusion Welding Techniques
PPR reducing tees are typically installed using heat fusion, a method that creates a homogeneous joint by melting the material of both the pipe and the fitting.
Steps for Heat Fusion:
1. Use a Quality Fusion Tool: Ensure the welding machine is in good condition and operates at the recommended temperature (typically 260°C).
2. Preheat the Tool: Allow the heating plates to reach the specified temperature before use.
3. Heat the Pipe and Fitting: Insert the pipe and reducing tee into the heating sockets for the time specified by the manufacturer.
4. Join Quickly and Precisely: Once heated, align and push the pipe and fitting together without twisting. Hold them steady for a few seconds to ensure a firm bond.
5. Allow Cooling: Let the joint cool naturally without applying external force or water.
4. Ensure Proper Alignment
- Avoid Misalignment: Improper alignment during installation can lead to stress on the joints, reducing their lifespan.
- Check Straightness: Use alignment tools or visually inspect to ensure the pipes and fitting are correctly aligned.
5. Perform Pressure Testing
- Hydrostatic Testing: After installation, conduct a pressure test to verify the integrity of the joints and the overall system.
- Monitor for Leaks: Inspect for any signs of leakage around the reducing tee.
- Follow Guidelines: Adhere to the manufacturer’s recommendations for test duration and pressure levels.
6. Protect the Plumbing System
- Prevent Overheating: Avoid exposing the system to temperatures beyond the rated limits of the PPR material.
- Minimize Mechanical Stress: Ensure the pipes are properly supported with clamps or brackets to prevent undue stress on the fittings.
- Avoid UV Exposure: For outdoor installations, use UV-protective coatings or insulation to protect the PPR material from degradation.
Common Mistakes to Avoid
- Using Incorrect Tools: Low-quality or incompatible fusion tools can compromise the joint strength.
- Insufficient Heating: Underheating leads to weak bonds, while overheating can deform the fitting.
- Rushing the Process: Failing to allow sufficient cooling time can result in misaligned or weak joints.
Proper installation and maintenance are crucial to ensuring the long-term reliability of a PPR reducing tee in a plumbing system. By following these recommended methods and best practices, you can create a durable, leak-free system that withstands the test of time. Adhering to manufacturer guidelines and using quality materials will further enhance the performance of your plumbing network.