
Walk in glass door cooler factory: behind the scenes of production
2026-11-16
Ever wondered what it takes to build the walk-in glass door coolers that keep your beverages perfectly chilled? Step inside the world of ART, where precision engineering meets hands-on craftsmanship. From raw metal sheets to gleaming, fog-free doors, this behind-the-scenes look reveals the hidden steps and quality checks that set ART apart. Join us as we walk the factory floor and uncover how these coolers are made to last—and why every detail matters.
Inside the Factory: How a Walk-In Cooler Begins as a Steel Coil
The journey of a walk-in cooler starts not with insulated panels or refrigeration units, but with a massive, tightly wound steel coil arriving at the factory floor. This raw material, often weighing several tons and gleaming under the overhead lights, is the backbone of the entire structure. Workers use overhead cranes to carefully position the coil onto a decoiler, a machine that slowly unwinds the steel, feeding it into a straightener. The straightener removes the natural curve from the coil, producing a flat, continuous sheet that will soon be cut, formed, and assembled into the durable shell of the cooler.
Once the steel is flat, a series of rollers and presses shape it into the structural components. The metal passes through a roll former, which bends the edges into precise profiles—channels, flanges, and interlocking seams that will later hold the insulation tightly in place. This is not a one-size-fits-all process; different cooler models require different widths and thicknesses, so the line is adjusted frequently. Operators monitor the machinery closely, checking gauges and making fine tweaks to ensure every piece meets the tight tolerances needed for a proper seal. The sound of shearing and punching fills the air as the steel is cut into lengths and punched with mounting holes.
After forming, the steel parts move to a coating station. Here, a durable finish—often a white polyester or a galvanized layer—is applied to resist corrosion and make the panels easy to clean. The coated steel is then stacked and sent to the assembly area, where it will be combined with polyurethane foam and other materials. But the foundation is already set: what began as a simple steel coil has been transformed into the rigid, precision-made skin of a walk-in cooler, ready to maintain cold temperatures in restaurants, laboratories, and warehouses around the world.
Shaping the Panels: Bending and Welding for a Perfect Fit
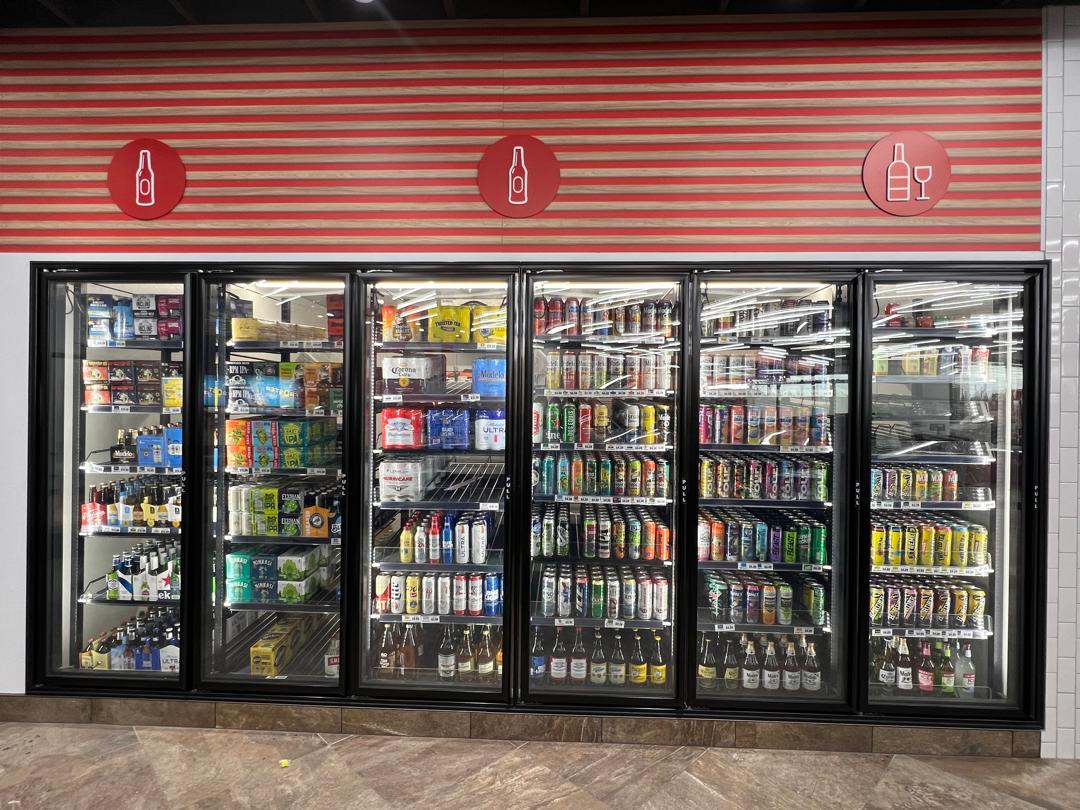
Getting a panel to hug every curve starts with understanding how the metal wants to move. Rather than forcing a sharp bend all at once, I work the sheet gradually over a rounded form or an old pipe, checking the radius against a cardboard template after each pass. This slow approach keeps the surface free of kinks and leaves a little extra material for final adjustment.
Before any sparks fly, the two edges need to meet without argument. I clamp the panels in place and spend time shaving high spots with a flap disc until the gap is even enough to slide a feeler gauge through with just a hint of drag. Then it's a series of small tack welds, alternating sides to pull the seam tight without building up heat in one spot.
Welding for a perfect fit is less about laying a heavy bead and more about respecting the panel's shape. I use short, overlapping stitches, letting each one cool until I can rest a bare hand nearby without wincing. Once the seam is filled, a light touch with a hammer and dolly restores any lost crown, and the finished panel should sit into place with no more pressure than a firm handshake.
Sealing the Cold: Assembling Glass Doors and Gaskets
Start with the gasket off the door and the glass panel resting on a padded surface. Warm the gasket in room air until it stops holding the folded shape from the box, then press it into the channel starting at the top center and working down both sides. The corners are where most leaks begin, so push the gasket fully into the radius instead of stretching it around the bend. If the door has a snap-in retainer, listen for a clean click at each tab before moving to the next one.
Hang the door before the gasket takes a set. Loosely thread all hinge screws and close the door to see where the gasket meets the frame. Shim the hinge side or adjust the mounting plate until the gap looks even, then tighten the screws in a diagonal pattern, checking the seal after every quarter turn. Over-tightening the top hinge pulls the door out of plane and leaves a cold spot at the lower latch corner, so keep that area slightly relaxed until the final pass.
Test the seal with a thin strip of paper trapped between the gasket and the frame; it should drag with steady resistance all the way around. If it slips free near the latch, adjust the strike plate outward in tiny increments rather than bending the door. Let the assembly sit closed overnight, then recheck the hinge torque and the gasket compression once the materials have settled into place.
Foam Insulation: The Hidden Layer That Keeps the Cooler Cold
Most people never think about the foam sandwiched between the cooler’s outer shell and inner liner, but that’s exactly where the magic happens. Unlike cheap hollow-walled coolers that rely on air alone, a proper rotomolded cooler packs dense polyurethane foam into every corner of the body and lid. The foam’s closed-cell structure traps millions of tiny gas pockets, which drastically slows down heat transfer from the outside. Even on a blazing afternoon, the inside stays close to ice temperature because the foam acts as a stubborn barrier—heat has to work its way through cell after cell, losing energy along the way.
Thickness matters more than most realize. A cooler with two inches of foam will hold ice noticeably longer than one with a single inch, not because of some brand secret, but simply because there’s more resistance for heat to travel through. The lid is often the weak point, since warm air rises and presses against the top, so quality coolers add extra foam there or use a gasket to seal the gap. Even small voids in the foam—caused by sloppy manufacturing or low-density fill—create shortcuts for heat, which is why you’ll sometimes find cheaper coolers sweating on the outside while pricier ones stay dry and cold for days.
Of course, foam alone won’t save a cooler if the seal is poor or the shell is thin. But when paired with a tight-fitting lid and durable rotomolded walls, the insulation does the heavy lifting. It’s the difference between grabbing a drink that’s still frosty after a long weekend and finding a lukewarm pool of water. Next time you’re shopping, press on the walls—if they feel solid and dense rather than hollow, you’re probably looking at a cooler with enough foam to actually keep its promise.
Wiring and Controls: The Brains Behind the Temperature
A thermostat alone doesn't heat or cool anything. The real work happens in the loop between sensor, controller, and output device. The sensor reads the current condition—say, air temperature or liquid bath temperature—and sends that signal through the wiring to a control board. The board compares the reading against a setpoint, then decides whether to close a relay for a heating element, open a valve for chilled water, or ramp a variable frequency drive. Without careful routing and termination of these conductors, even a well-chosen controller will chase phantom readings caused by noise or loose connections.
Modern temperature controls lean heavily on microprocessors running PID or fuzzy-logic routines. These algorithms don't just switch on and off at a threshold; they calculate how far the process is from target, how fast it's moving, and how long it's been off track. That means the wiring has to be more than just copper—shielded twisted pairs for thermocouple signals, dedicated grounds for analog inputs, and separation between low-voltage sensor lines and high-current heater feeds. A single ground loop or reversed polarity on a solid-state relay can turn a stable system into an oscillator that hunts around the setpoint for hours.
In practice, the control panel becomes the system's nervous system. A walk-in freezer might have six temperature probes, two evaporator fans, a defrost heater, and a door switch—all landing on a compact controller. Each terminal connection carries a small but critical piece of information, and a mislabeled wire can cost more in downtime than the entire control board. Troubleshooting usually starts with a voltmeter at the terminal strip, not with replacing the sensor. That's because the brains behind the temperature are only as reliable as the paths that feed them.
Testing Day: Leak Checks, Temperature Drops, and Final Sign-Off
The morning starts with soapy water and a flashlight, not because anything is obviously wrong, but because test day is about catching the leaks that only show up under pressure. Every flare fitting, every valve cap, every braze joint gets a slow once-over. When a tiny bubble blooms along a thread, it's almost a relief—that's one more weak point found before the system has to earn its keep. Torque wrench settings get checked against the spec sheet, not memory, because a half-turn too loose can turn a quiet install into a callback.
Temperature drop is the second half of the story. Once the circuit holds pressure and the vacuum decays at an acceptable rate, the blower gets switched on and the gauges take over. You're watching for a specific spread—supply air versus return air—and it never matches the textbook on the first pass. Sometimes the filter is the culprit, pulling the numbers down; other times the charge needs a nudge. The trick is not to chase the exact degree, but to let the system settle into its own rhythm and then verify it falls within range.
By late afternoon, the clipboard comes out. Readings get written down with a pen, not typed into a phone, because someone has to be able to read them a decade from now. If the leak checks are clean and the temperature drop holds, the final sign-off is less a formality and more a handshake between what was designed and what was actually built. The customer gets a copy, the file gets closed, and the system officially starts its working life.
FAQ
The sheer size of the panels. Insulated steel sheets get cut and foamed right there, and the hiss of the injection machines never stops. You also smell the polyurethane as it cures.
Most doors use double or triple panes with a low-E coating and argon gas fill. The frames have embedded heating wires around the edges, which keeps condensation off without making the glass warm to the touch.
Every unit gets a door cycle test—opening and closing thousands of times—plus a pull-down test where the interior has to hit a set temperature within a certain window. If a gasket leaks, the pressure test catches it.
It's a mix. Robots handle the heavy foam injection and sheet metal bending, but final door alignment, seal fitting, and wiring are still done by hand. You can spot the shift supervisor's initials on inspection tags.
Polyurethane foam is standard because it cures rigid and gives around R-7 per inch. Cheaper polystyrene would save money but crumbles after years of door slams and vibration.
A standard 8x8-foot unit can go from flat steel to packed crate in about six hours. Custom sizes with multiple doors add a day or two, mostly because the foam has to cure fully before trimming.
The floor panel has to be strong enough for a loaded pallet jack, so we bond a non-slip aluminum diamond plate on top. Without that, a dropped case of milk would dent the floor and break the vapor seal.
Panels get stacked flat with foam spacers, then plastic-wrapped and steel-banded to a pallet. The glass doors ship in their own crates with foam corners, and each door is slightly ajar so the gasket doesn't compress permanently.
Conclusion
The journey of a walk-in glass door cooler starts far from the showroom floor, in the quiet hum of a steel mill. Inside the factory, massive coils of galvanized steel are unrolled and cut into precise lengths. These sheets don't stay flat for long—hydraulic presses and roll formers bend them into the interlocking panels that will become the walls and ceiling of the cooler. Welding stations then fuse corners and reinforce edges, ensuring every panel fits together with almost no visible seam. It's a process that demands both brute force and fine calibration, since even a millimeter of misalignment can compromise the entire structure.
Once the metal shell takes shape, the real magic happens in the assembly line. Workers fit tempered glass doors into their frames, pressing flexible gaskets into channels to create an airtight seal. Behind the scenes, a two-part polyurethane foam is injected into the panel cavities, expanding to fill every gap and hardening into a dense insulation layer that locks the cold inside. Meanwhile, electricians route wiring for interior lighting, digital thermostats, and defrost cycles—the brain of the unit. Finally, every cooler goes through a gauntlet of tests: pressurized leak checks, rapid temperature pull-down trials, and a visual sign-off by a quality inspector. Only after passing all of these does the cooler earn its place on a truck, ready to keep perishables chilled in restaurants, labs, and grocery stores around the world.
Contact Us
Contact Person: Ellen
Email: [email protected]
Tel/WhatsApp: +86-535-2229725
Website: https://www.artrefrigeration.com/