
Paving Tiles Factory Insights: From Raw Materials to Finished Products
2026-09-02
What really happens between a pile of raw clay and the clean, uniform paving tile you walk on every day? At Beata Ceramics, that gap is where the story gets interesting. Instead of a generic production line, think of it as a controlled recipe: every batch of shale, feldspar, and recycled material is measured, milled, pressed, and fired under conditions that leave little room for guesswork. In this post, we pull back the curtain on the entire route—from raw material intake and body preparation to glazing, firing, and final quality checks. Whether you’re specifying tiles for a commercial project or just curious why some tiles outlast others, these factory insights will change how you look at the next paved surface.
Sourcing Raw Materials That Won't Fail Under Foot Traffic
Choosing materials that can withstand heavy foot traffic goes far beyond checking initial hardness ratings or a polished showroom sample. The real test happens months after installation, when constant abrasion, impact from heels or equipment, and exposure to moisture start to reveal weaknesses. Some products look flawless in a controlled display but develop scratches, edge chipping, or even loosening once they face the daily grind of a busy corridor. Instead of relying on glossy brochures, request abrasion resistance data, impact test results, and real-world case studies from suppliers. High-density porcelain tiles, properly sealed natural stone, and specific engineered hardwoods often outperform their more delicate counterparts in high-traffic environments.
Maintenance and replacement frequency also matter as much as the initial purchase price. A cheaper material that scuffs easily may seem budget-friendly, but constant repairs, deep cleaning, or premature replacement can quickly erase those savings and disrupt daily operations. Look for surfaces that develop a desirable patina over time rather than degrading visibly under stress. For example, well-sealed concrete, commercial-grade vinyl, or quartz-based composites have proven reliable in airports, retail stores, and office lobbies where footfall never pauses. Ask suppliers about long-term wear in comparable settings, not just isolated lab tests.
Finally, consistency across supply batches can make or break a flooring project. Even if the first shipment passes every performance test, later batches from a different quarry or production run may behave differently under the same conditions. Require batch samples for approval and, if possible, conduct a small-scale on-site installation before committing to a full order. A material that cannot be supplied with predictable, repeatable characteristics is a risk no amount of specification paperwork can eliminate.
Batch Mixing Pitfalls That Show Up Later as Hairline Cracks
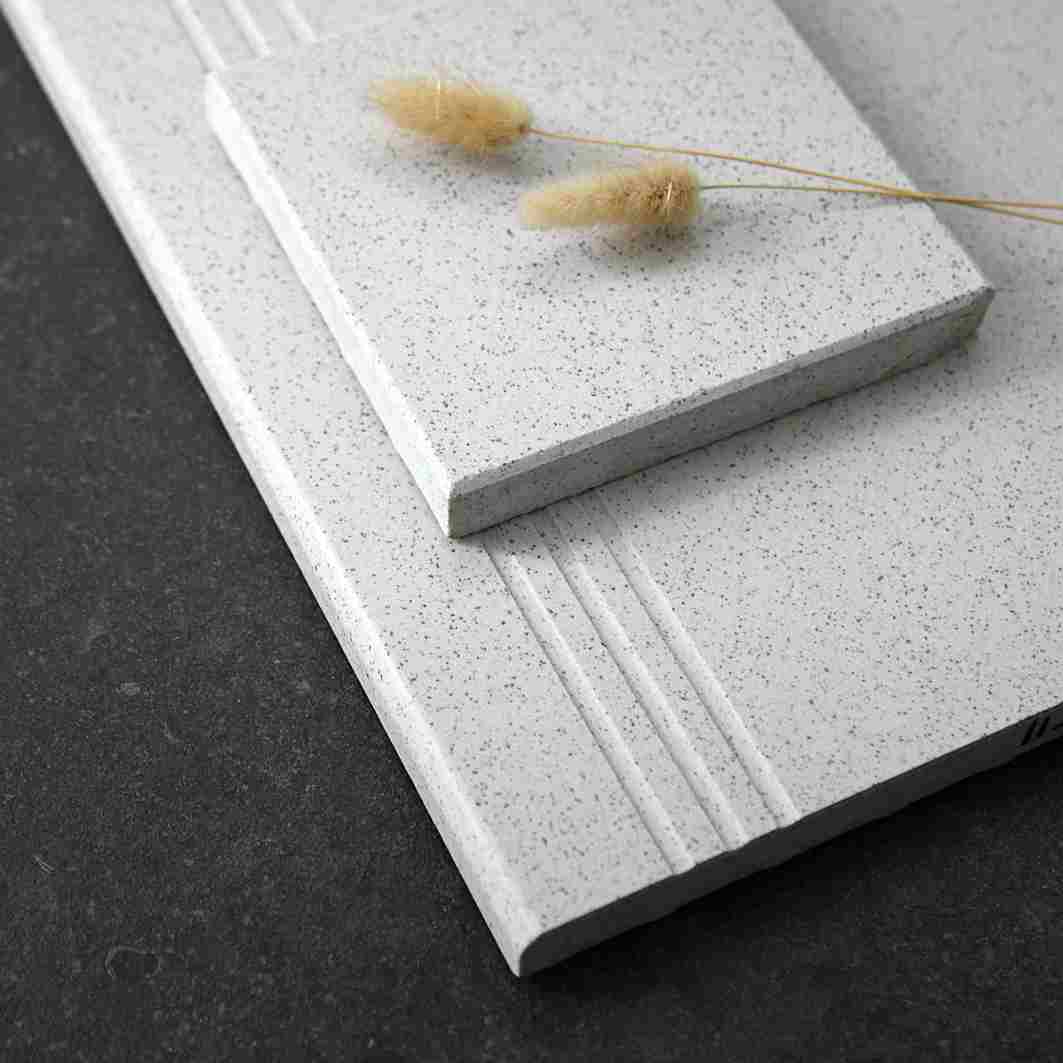
Many operators treat batch mixing as a routine step, but subtle inconsistencies at this stage rarely announce themselves immediately. Instead, they linger in the cured material and surface weeks or months later as fine, radiating lines that undermine both appearance and structural integrity.
One of the most common culprits is uneven dispersion of additives or pigments. When a mixer runs too briefly or at the wrong speed, pockets of concentrated material remain. As the batch cures, those pockets shrink at different rates than the surrounding matrix, creating internal stress. Over time, that stress releases as hairline cracks, often following the path of least resistance along edges or around embedded objects.
Temperature during mixing also plays a quiet but decisive role. A cold component may not fully integrate, while an overheated batch can accelerate early hydration or polymerization before placement. Both scenarios leave micro-voids that later expand under thermal cycling or load. The fix is rarely more mixing—it's smarter mixing with calibrated times, controlled temperatures, and routine checks on blade wear and tank cleanliness.
Hydraulic Press Settings Most Factories Get Wrong
Plenty of shops treat hydraulic press tonnage like a volume knob—crank it to max and hope for the best. The trouble is, full force rarely matches the job. Running a forming or straightening operation at 100% capacity when the die only needs 40 tons doesn't just waste energy; it flexes the frame, accelerates seal wear, and often masks the real issue: the tooling or material setup was never dialed in. A quick check of the pressure reducing valve against the actual die load chart will usually reveal a gap of 15–25%, and closing that gap almost always tightens dimensional consistency without any other change.
Dwell time is another silent culprit. Operators set the timer to whatever the last shift left, or they disable the hold phase entirely to keep cycle counts high. But for materials that spring back—high-strength steel, thick aluminum, stacked laminations—a rushed dwell means the workpiece is still moving when the ram retracts. Two or three extra seconds under pressure lets the material settle into its final shape, reducing post-process straightening and scrap. The setting should be tied to part thickness and alloy, not to a generic default buried in the HMI.
Speed settings get overlooked because they feel like a productivity lever, not a quality one. Fast approach saves a second, but if the ram transitions to work speed too late—or too early—you either slam the tool into the part or crawl through the entire stroke. Many machines ship with aggressive factory speed curves that work fine in a demo and poorly on a real die. Adjusting the transition point and work speed by as little as 10–15 mm/s often eliminates impact marks, reduces noise, and extends punch life more than any fancy coating.
Why Curing Time Makes or Breaks a Paving Tile
Curing time is often treated as an afterthought, but it’s the silent factor that decides whether a paving tile holds up under years of foot traffic or starts crumbling after the first freeze-thaw cycle. Concrete doesn’t dry—it cures through a chemical reaction between cement and water. If that reaction is cut short, the tile never reaches its intended strength, even if it looks perfectly solid on the surface. The difference between a rushed job and a properly cured tile shows up later as hairline cracks, surface flaking, or edges that chip away.
The first 48 to 72 hours matter most because that’s when the cement paste builds its initial backbone. Keeping the tile moist and shaded during this window slows down moisture loss from the surface while the interior continues to gain density. Slowing down the curing process might feel counterproductive on a tight production schedule, but pushing tiles out too early is a shortcut that costs more in returns and replacement work than it saves in time. A tile that cures for the full recommended period—often up to 28 days for full strength—will resist abrasion, absorb less water, and stay dimensionally stable in changing weather.
That’s the real reason curing time makes or breaks a paving tile: it’s not about how hard the tile feels when you tap it, but about whether the internal structure has had time to finish the chemical work. A well-cured tile doesn’t just meet a strength test on day one—it keeps performing long after the installation is forgotten.
Surface Treatments That Extend Life Without Slipping
Extending the service life of a component usually means hardening its surface, but that often turns it into a slick, dangerous contact point. The real trick is to build durability without sacrificing grip. A few well-chosen surface treatments manage both by changing the micro-topography rather than just piling on hardness. Instead of a mirror-smooth finish, you get a finely textured layer that resists wear while still giving shoes, tires, or tool handles something to bite into.
One practical approach is laser texturing, where a tightly focused beam etches tiny dimples or channels into the metal or polymer. These features spread out stress so cracks don't start easily, and they also trap microscopic debris that would otherwise act like ball bearings. Another route is a ceramic-infused coating that cures to a slightly rough, glass-like skin. The ceramic provides the long-wear barrier, while the controlled roughness keeps the coefficient of friction steady even when wet or oily.
What makes these finishes stand out is that they refuse the old trade-off between longevity and traction. A textured hard surface often outlasts a smooth one because the peaks take the initial contact and shield the valleys from abrasion. Meanwhile, the same peaks provide mechanical interlock with whatever presses against them. The result is a floor plate, shaft, or grip that stays safe underfoot or in hand for years longer than a conventional hardened part, without ever feeling like ice.
What Happens Before the Pallet Leaves the Loading Dock
The journey starts well before the dock door rolls up. Warehouse associates pull cartons from pick locations using handheld scanners, building the pallet layer by layer according to a digital packing slip. Heavier, sturdier boxes form the base; lighter or odd-shaped items sit on top, and that order gets checked twice against the order manifest. If a case count is off by even one unit, the pallet is set aside in a staging lane rather than moving forward.
Once the stack passes the initial count, it's wrapped with stretch film—sometimes by machine, sometimes by hand—to keep everything from shifting during transit. A label with the shipment ID, destination code, and any handling flags (like 'fragile' or 'do not stack') goes on at least two sides of the wrapped pallet. Some facilities also run it over a floor scale or snap a quick photo for damage claims later.
After labeling, a certified forklift operator moves the pallet to the outbound staging area near the assigned dock door. Carriers often require that pallets be ready at least an hour before the truck backs in. The final step is a spot check at the dock: the dock supervisor compares the pallet count and destination against the load plan, then signs the dock receipt or updates the WMS. Only then does the pallet cross the threshold onto the trailer.
FAQ
Most paving tiles start with ordinary Portland cement, sharp sand, and crushed stone or gravel. The ratio shifts depending on the expected load—heavier traffic calls for more aggregate and less sand. Color comes from iron oxide pigments, and some plants add polypropylene fibers or a small amount of polymer to reduce surface cracking and boost freeze-thaw resistance.
The dry ingredients are weighed and mixed first, then water is added to reach a low-slump consistency. From there, the mix moves into a hydraulic press or a vibrating block machine. Pressure and vibration compact the material inside a steel mold, squeezing out air and forcing the particles into tight contact. The green tile is then demolded and moved to a curing rack.
Cement needs moisture and time to hydrate properly. If a tile loses water too fast in the first days, the surface can become weak and dusty, and micro-cracks may appear. Factories often keep freshly pressed tiles in a humidity-controlled chamber or under plastic sheeting for at least a week. This slow moisture retention is what builds the final compressive strength and abrasion resistance.
Factories pull samples from each batch to check dimensions, thickness, and squareness. They also run water absorption tests, where tiles are soaked and weighed to see how much moisture they take in. Compressive strength is measured by crushing sample tiles in a press. If a batch fails on color consistency or surface defects, it gets pulled aside for rework or crushing.
The texture often comes from the mold face itself—rubber or urethane liners can mimic natural stone, slate, or wood grain. After pressing, some tiles go through a secondary process like shot blasting, acid washing, or tumbling to expose the aggregate and create a rougher, slip-resistant surface. The choice depends on whether the tile is meant for a patio, driveway, or pool surround.
Pigment is weighed with the same precision as cement, and the mixing time is standardized so the pigment disperses evenly. Factories often pre-blend a large batch of dry pigment with a carrier like sand, then store it in silos. They also track lot numbers of raw materials, because a slight change in cement shade or sand source can shift the final color even when the formula stays the same.
Most plants don't send them to a landfill. Cracked and off-spec tiles are run through a crusher and turned into recycled aggregate, which can replace a portion of virgin stone in new tile mixes. Slurry from cutting and grinding is often filtered and the solid residue reused as well. This cuts material costs and keeps the factory floor cleaner.
Modern lines use automated batching systems that pull exact weights from silos, so human error in mixing is mostly gone. Presses run on programmable cycles, and robots stack and palletize tiles far faster than manual labor. Sensors monitor curing temperature and humidity, adjusting conditions automatically. The result is tighter tolerances, fewer wasted batches, and a more consistent product run after run.
Conclusion
A paving tile may look straightforward, but the factory floor tells a different story. Start with raw materials that won't crumble under constant foot traffic—this means selecting aggregates with high compressive strength and low water absorption, not just whatever is cheapest from the nearest quarry. Once the materials are on site, batch mixing becomes a quiet killer: even slight variations in moisture or a few seconds of uneven blending can leave dry pockets that later open up as hairline cracks. Then come the hydraulic presses, where most factories dial in the same pressure for every mix, ignoring how aggregate size and moisture should change the settings. Too much force shatters the aggregate, too little leaves the tile porous and weak. And after pressing, curing time is not a suggestion—rushing it to save space or meet an order just means the cement never fully hydrates, so the tile looks fine on day one but loses strength over months.
Surface treatments are where longevity meets safety. A properly textured top layer—whether from fine aggregate exposure, light sandblasting, or a chemical hardener—keeps the tile from becoming slippery when wet without wearing down after a few seasons. But all that work means little if the final check is sloppy. Before any pallet leaves the loading dock, someone has to look at edge chipping, colour consistency, thickness tolerances, and random sample strength. The best factories treat this not as a formality but as the last honest conversation between the production line and the customer. From raw material choice to the final shrink-wrap, every decision compounds—good or bad.
Contact Us
Contact Person: Emma
Email: [email protected]
Tel/WhatsApp: 8618064423698
Website: https://www.beataceramics.com/